Gerald McAlister | RGB Haptics | Beginner


Gerald McAlister | RGB Haptics | Beginner
This tutorial covers how to install and setup RGB Haptics at a very basic level. By the end of this tutorial, you will have a scene where a box will be playing a sound in a scene, and you can place your hands in this box to feel the haptic feedback of the sound being played. A completed version of this tutorial can be found in the included demo scene “Basic Setup” within the RGB Haptics asset.
Before diving into setup, let’s take a moment to understand RGB Haptics. There are many tools out there to handle haptics, a few have cropped up for virtual reality specifically. Many of these have a problem however: They treat haptics like a texture. The idea is that you can add a “haptic texture” to an object (like a piece of wood) and “feel” what that texture feels like. We think that this is the wrong approach to haptics however.
Modern controllers cannot convey a sense of tactile sensation, or what a texture feels like. What they can do, is provide a sense of vibrations. This important distinction is what RGB Haptics makes use of: Vibrational Haptics. For example, when you shake a glass filled with ice cubes, you’ll be able to feel the vibrations of the ice cubes in the glass. This will let you do things like count how many ice cubes are in the glass as you shake it! RGB Haptics aims to make it easy for developers to implement these types of haptics in their apps and games.
Before setting up RGB Haptics, ensure you have a simple virtual reality compatible scene setup and ready to go. There are a variety of tutorials on the internet for this, and we have made our own in 2020 available here. Ensure that your scene simply has a plane, a camera for the player’s head, and the player’s left and right hands (these can just be spheres to represent them).
To begin, you will need to install the tools to your project. This can be done by purchasing the tools from the Unity Asset Store and importing them into your project. Once done, find the XRNodeHaptics script and add it to each hand object in your scene. Make sure to select which hand the scripts are attached to, as seen in the image below.
 Each hand will have a different setting.
Next, add both a SphereCollider and a RigidBody component to each hand. On the SphereCollider, ensure that “Is Trigger” is enabled and that the size of it is set to 0.5. Ideally this SphereCollider should cover the entire hand model used. For the RigidBody, you should not need to change anything. The settings of these can be seen below:
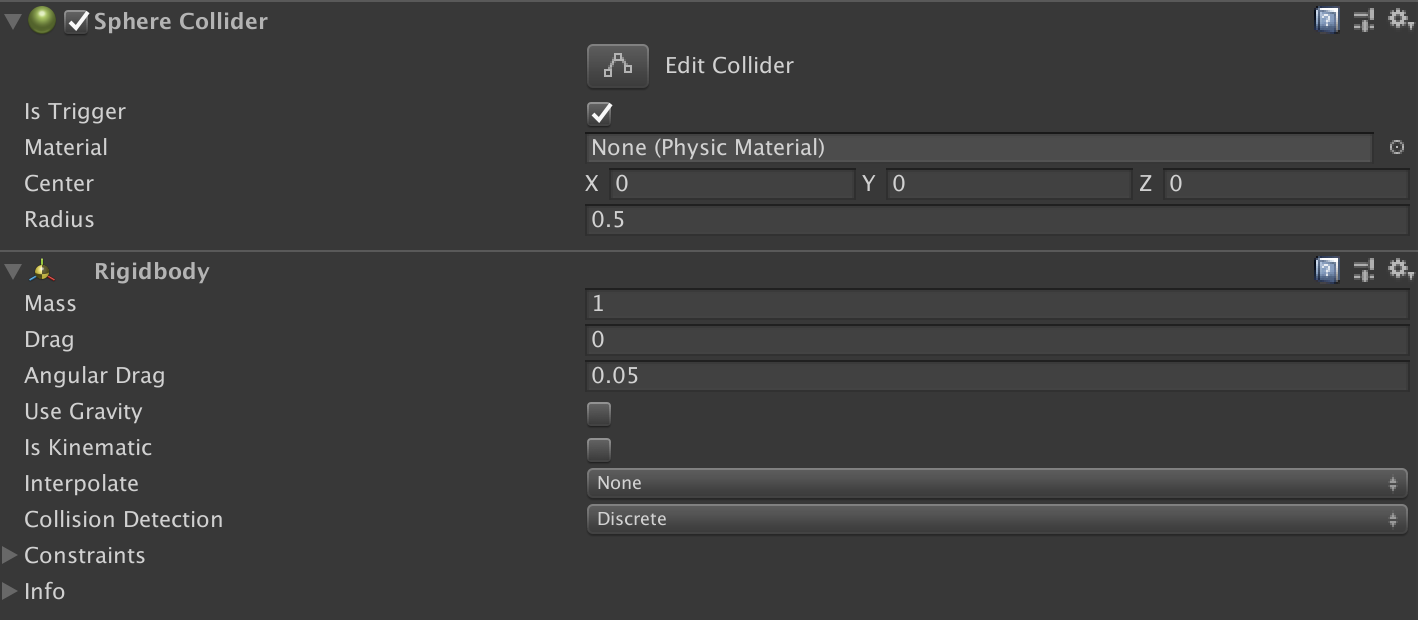 The settings should look like this.
To add a sample sound, we first need a box to represent where this souond is in 3D space, and the sound itself. We can begin by adding a cube to the scene, naming the newly created GameObject “Cube” for simplicity. Next, attach an AudioSource component to this new GameObject, set it’s AudioClip to to the included Heartbeat audio, and ensure that “Play On Awake” and “Loop” are both enabled. Also set the value of “Spatial Blend” to 1 (maxing out 3D on it). Your AudioSource settings should look like this:
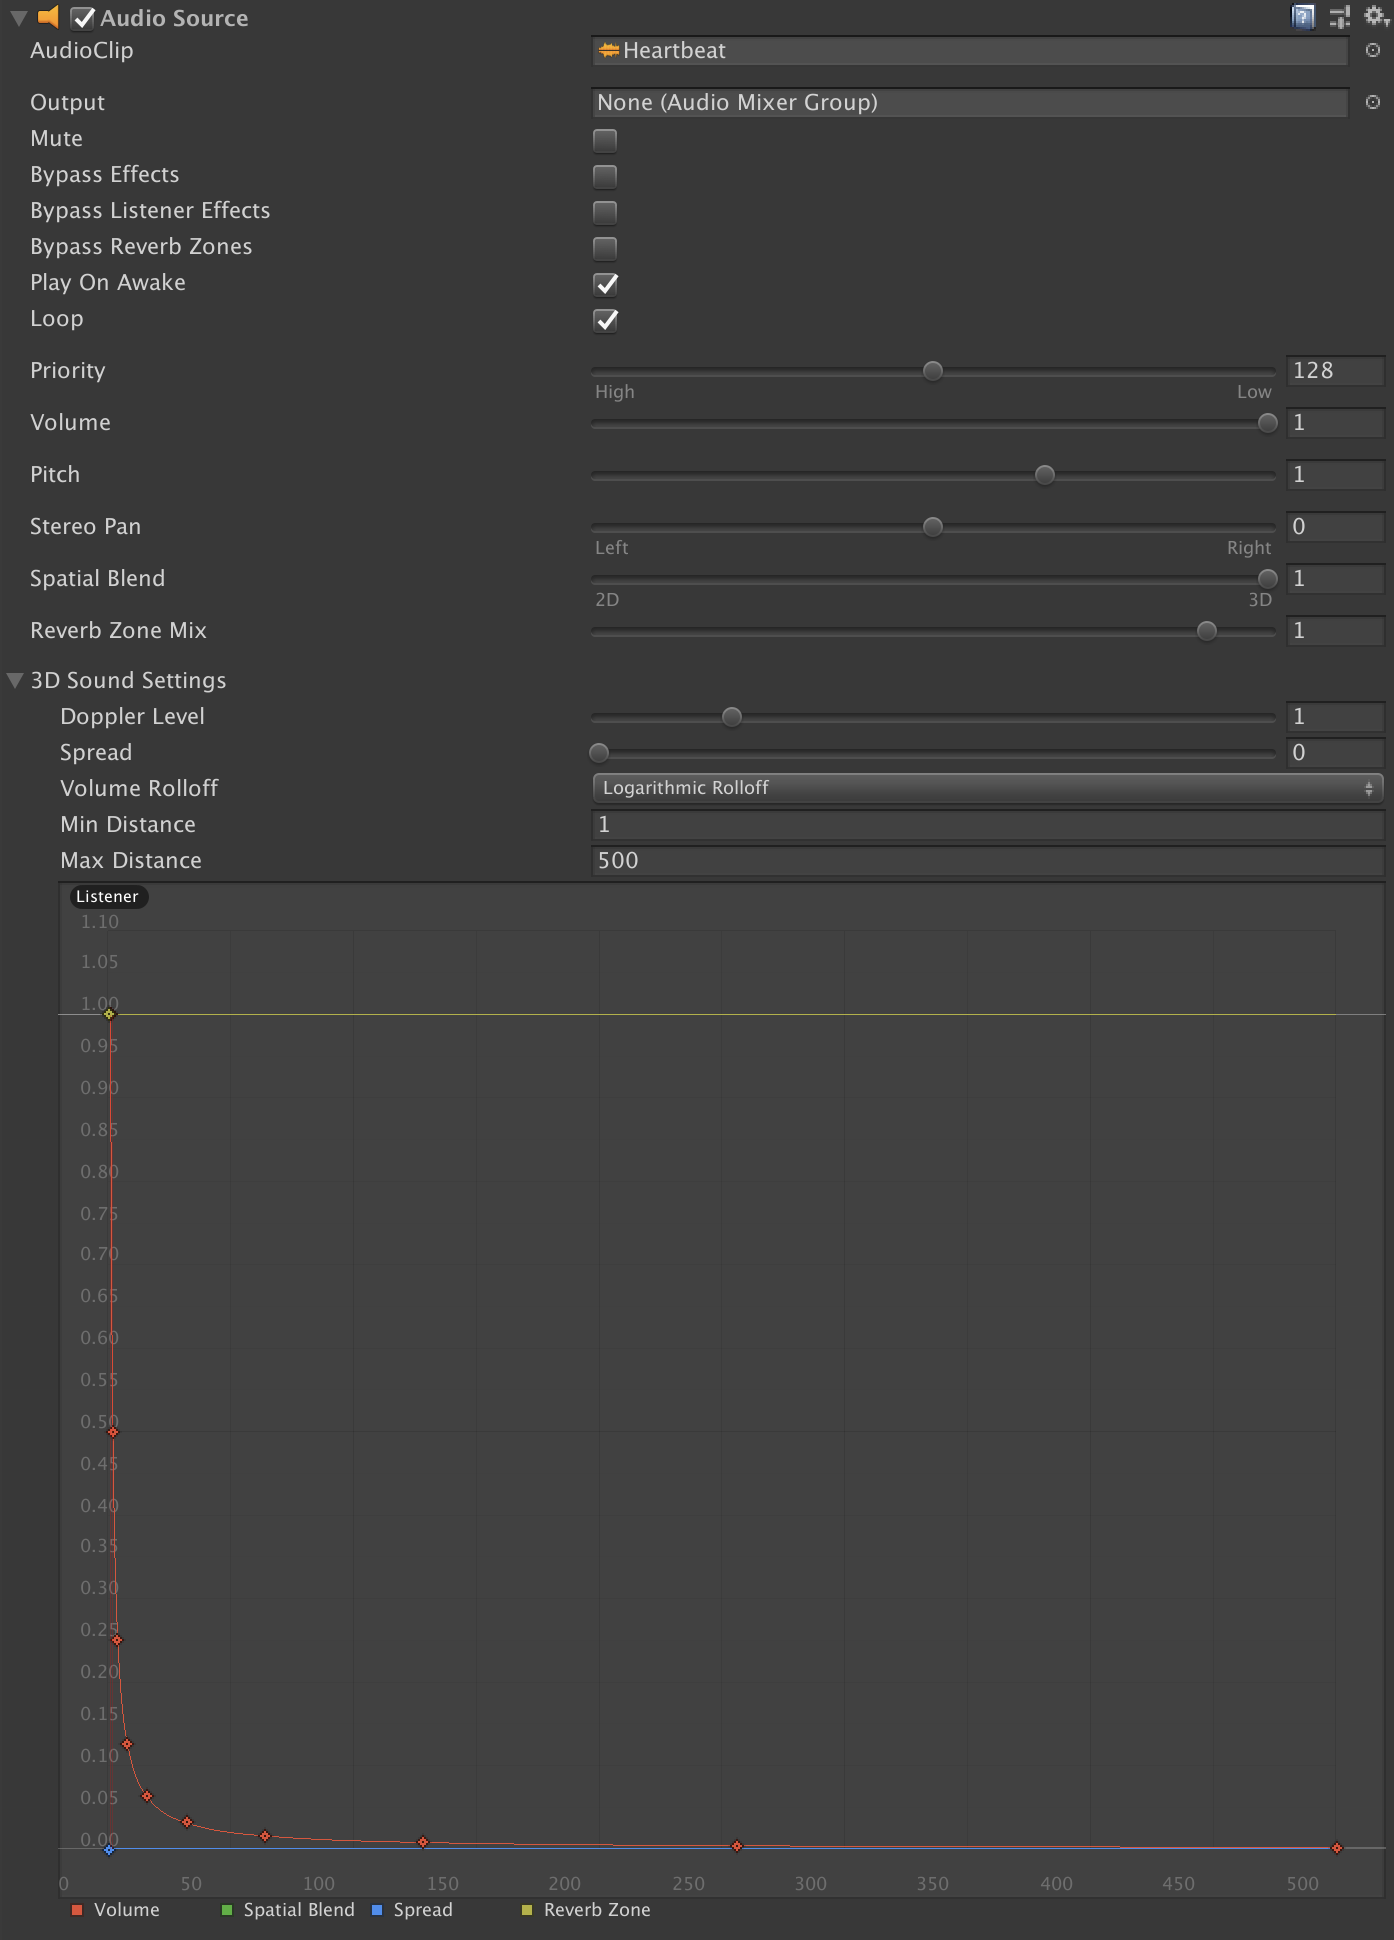 The AudioSource settings.
Finally, let’s add some haptics to the AudioSource we previously created. Add a new ContinuousHaptic component to the Cube GameObject we created previously, and set its type to “Audio”. Enable both “Play On Awake” and “Loop” for the ContinuousHaptic component as well. Next, expand the “Advaned Settings” dropdown menu. Under this, you will see a “Sync Audio Source” option. This will ensure that our audio and our haptics do not get out of sync at any point. To enable this, simply drag your Cube GameObject into this spot, which will automatically have it sync with the AudioSource on the Cube. Your settings should look like this:
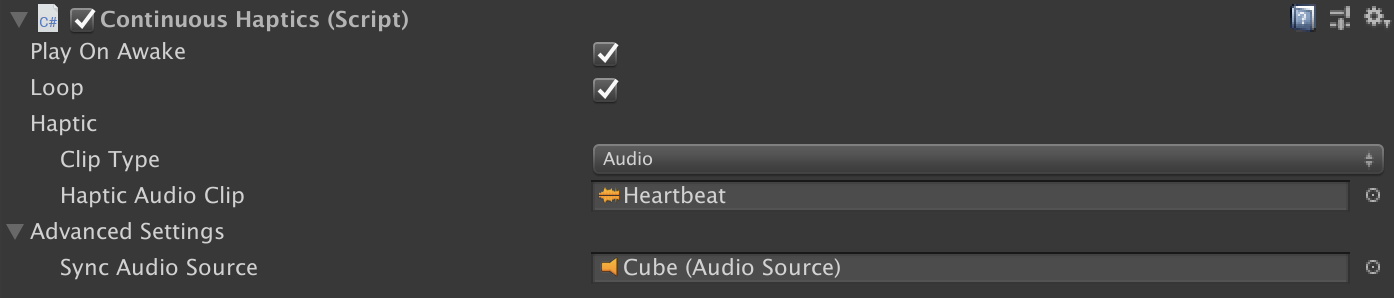 The ContinuousHaptics settings.
To try out this demo, run it on the desired headset, and place either hand inside of the Cube. When inside, you should not only hear the audio, but feel the audio in the hand that you have placed inside the cube! Not feeling it? Double check a couple of things: